Before we get in to the training for this new feature, let's discuss why we built it and the use-cases we built it to support.
First: We get it; recording videos is intimidating for many. Something about staring at a camera and hitting record makes many uneasy which also makes delivering a concise message in as short of time as most of us would like a challenge. Some SalesReach customers reported that creating a short 1.5 minute video was sometimes taking them so many takes that it would eat up 15 minutes of their day. PER VIDEO!?!? If video is going to become a tool your team and company actually utilize we knew we needed to make a solution to get to a final product faster for all.
Second: Editing videos isn't just something people do when they make mistakes. Editing videos is a great way to shorten the final product by removing unnecessary portions and to make the video more fun by adding interesting jump cuts to ensure the time people spend watching your videos are filled with the most high-value information needed.
In short, not everyone can or should just "Hit Record" and share whatever is captured exactly how it was recorded. Sometimes we should spend a little more time, which might actually save us all some time, and make the video more memorable, digestible and quickly informative for our customers.
With that, Let's get started. Welcome to One Take Video!
Functions
One Take Video includes functions which can be used both while recording and post-recording to help you craft the perfect video.
While Recording
Space Bar (adds cut to play bar): Should you decide you would like to mark your editor to make finding any mistakes or intentional edit points easy once video recording completes, just hit the space bar on your computer while recording. When you do this, you will actually see a red mask appear over the recorded video to alert you that a marker has been recorded.
It will look a little like this:

You can then recompose yourself or your environment in-frame and begin speaking/presenting when ready. This will make finding edit points when in the editor easy so we encourage you to get familiar with marking your video cut points at the beginning and end of frames with your space bar.
Pro tip: Using the cut marker is a great way to mark fumbles you intend to edit out while speaking and is also a great way to mark an area you intentionally intend to remove such as the time you spend setting up a screen record or other visual in-screen.
Post-Recording
Below you will see what the One Take Video editor window looks like when editing your video prior to adding to page. In this image you will see 5 key functions:

Split Clip:
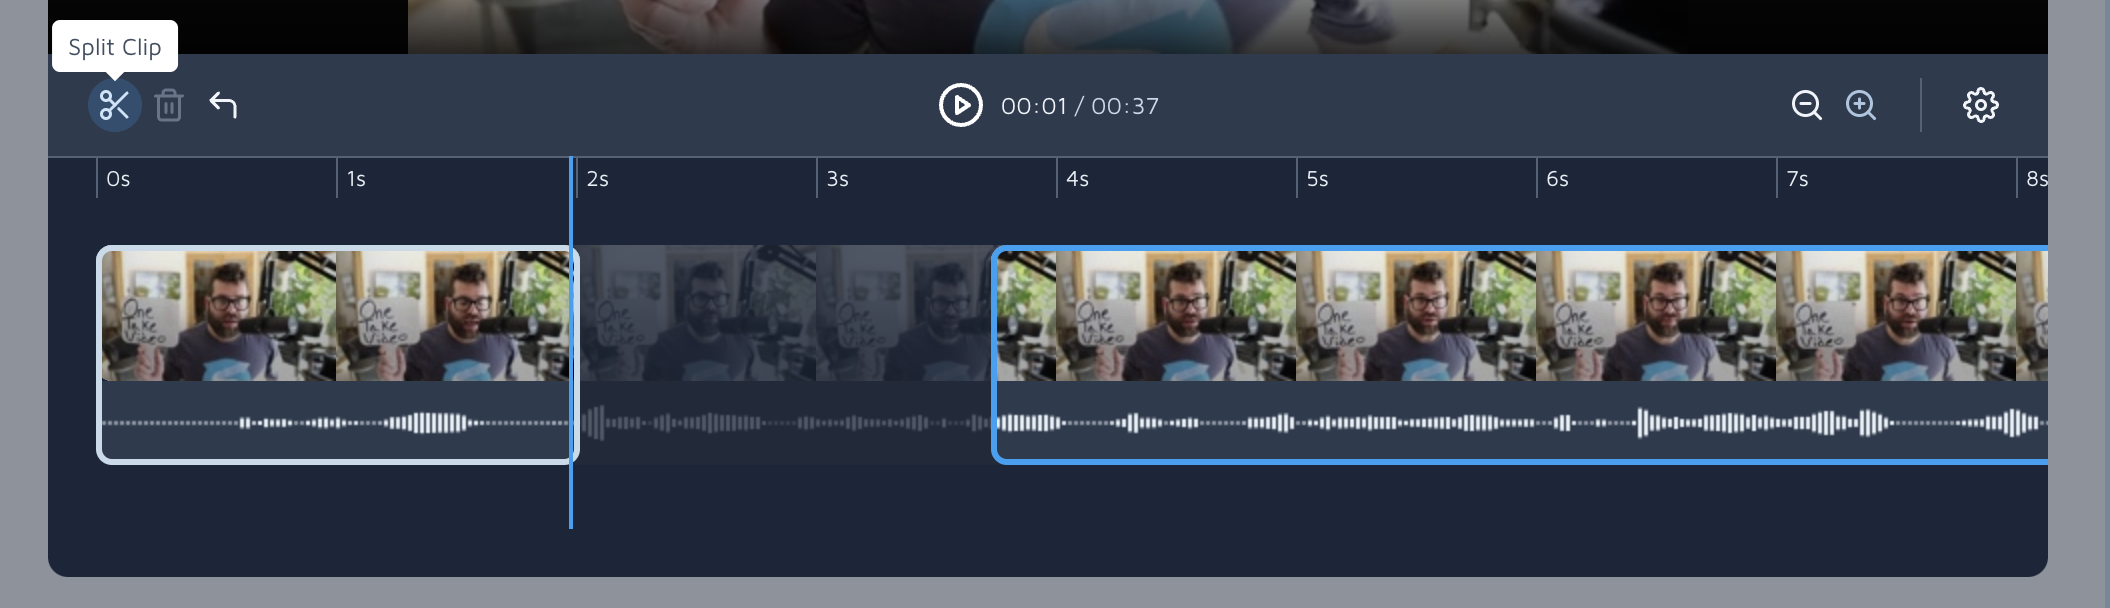
Adds a cut to the editor wherever you place the playhead which allows you to remove portions of the video by sliding the editor left/right. Areas removed will appear faded out as represented above.
Delete Clip:
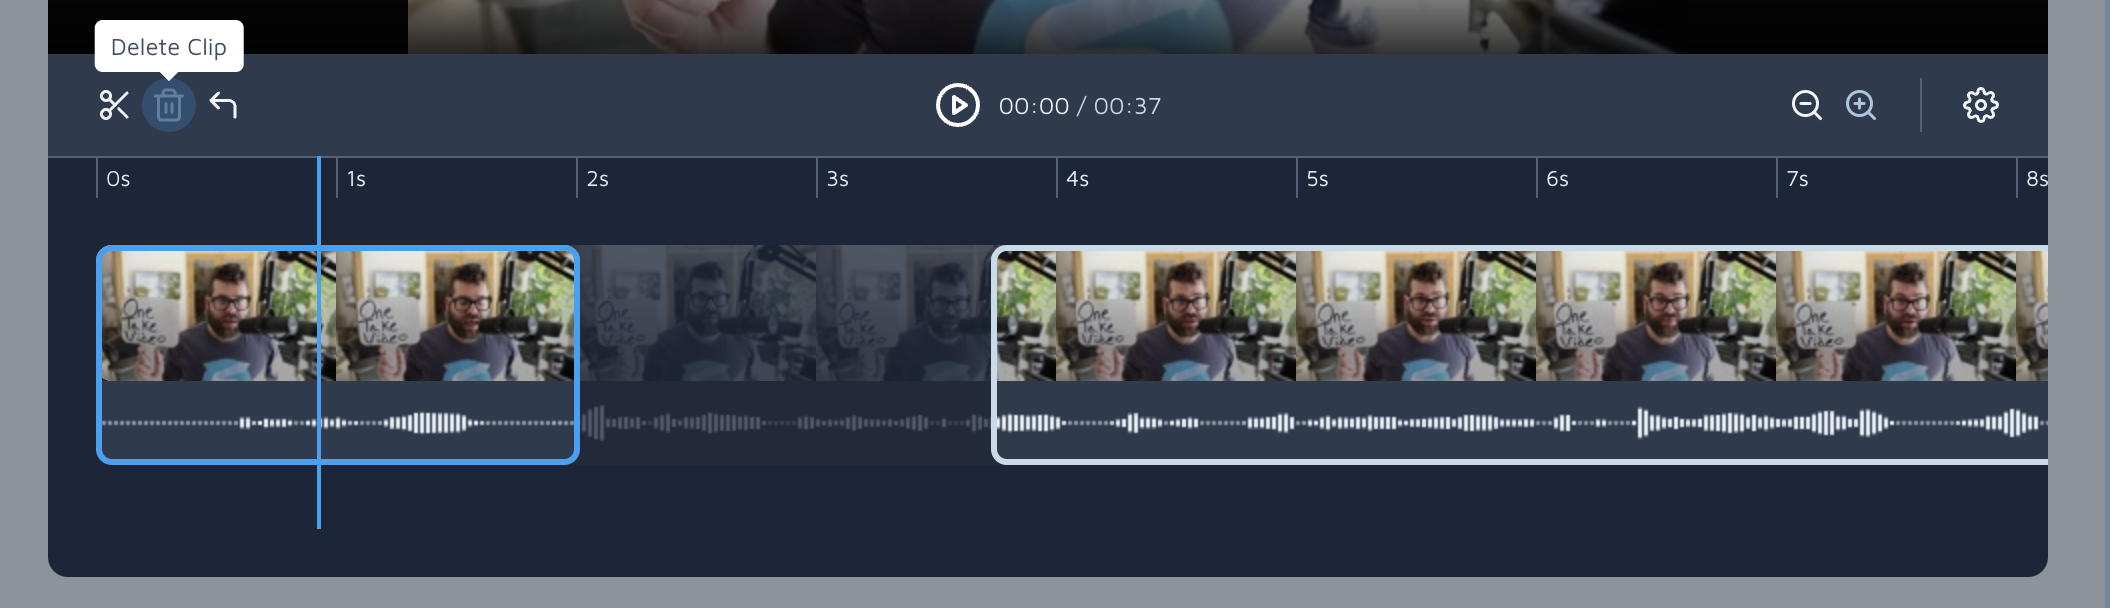
Remove an entire video clip segment by selecting it and then clicking the Delete Clip button. Video clips are selected by clicking anywhere on the clip. You'll know which clip you have selected because it will be framed in blue (as pictured). Clips can be removed from the beginning, end or anywhere within the video prior to save.
Undo:
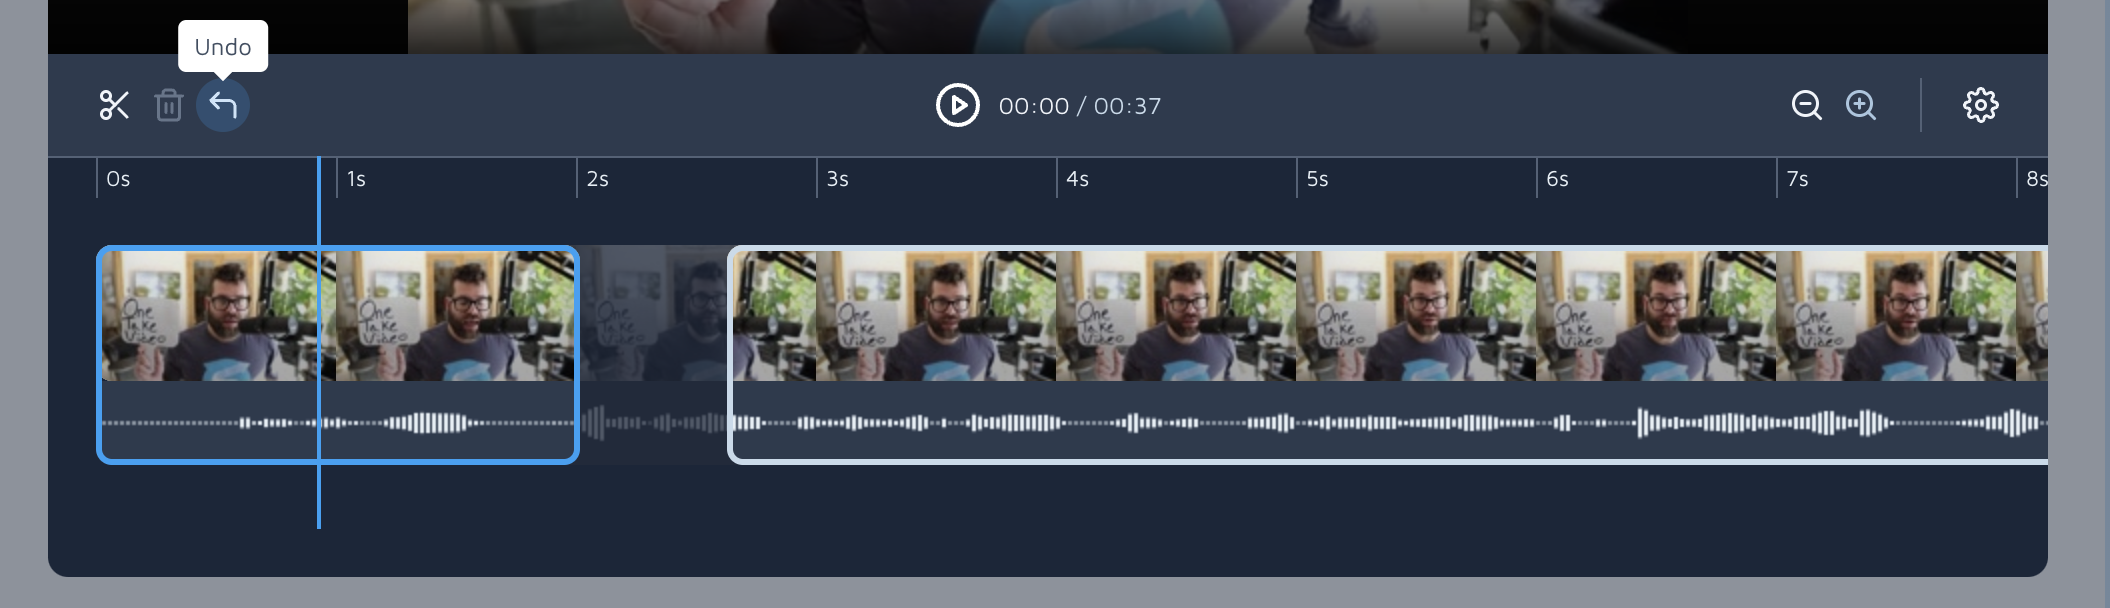
Pressing "Undo" will allow you to undo your previous edits. Undo will continue to restore edits in reverse order of how they were applied for as long as you hit Undo up to the point that the video is restored to its original unmodified state.
Zoom +/-:
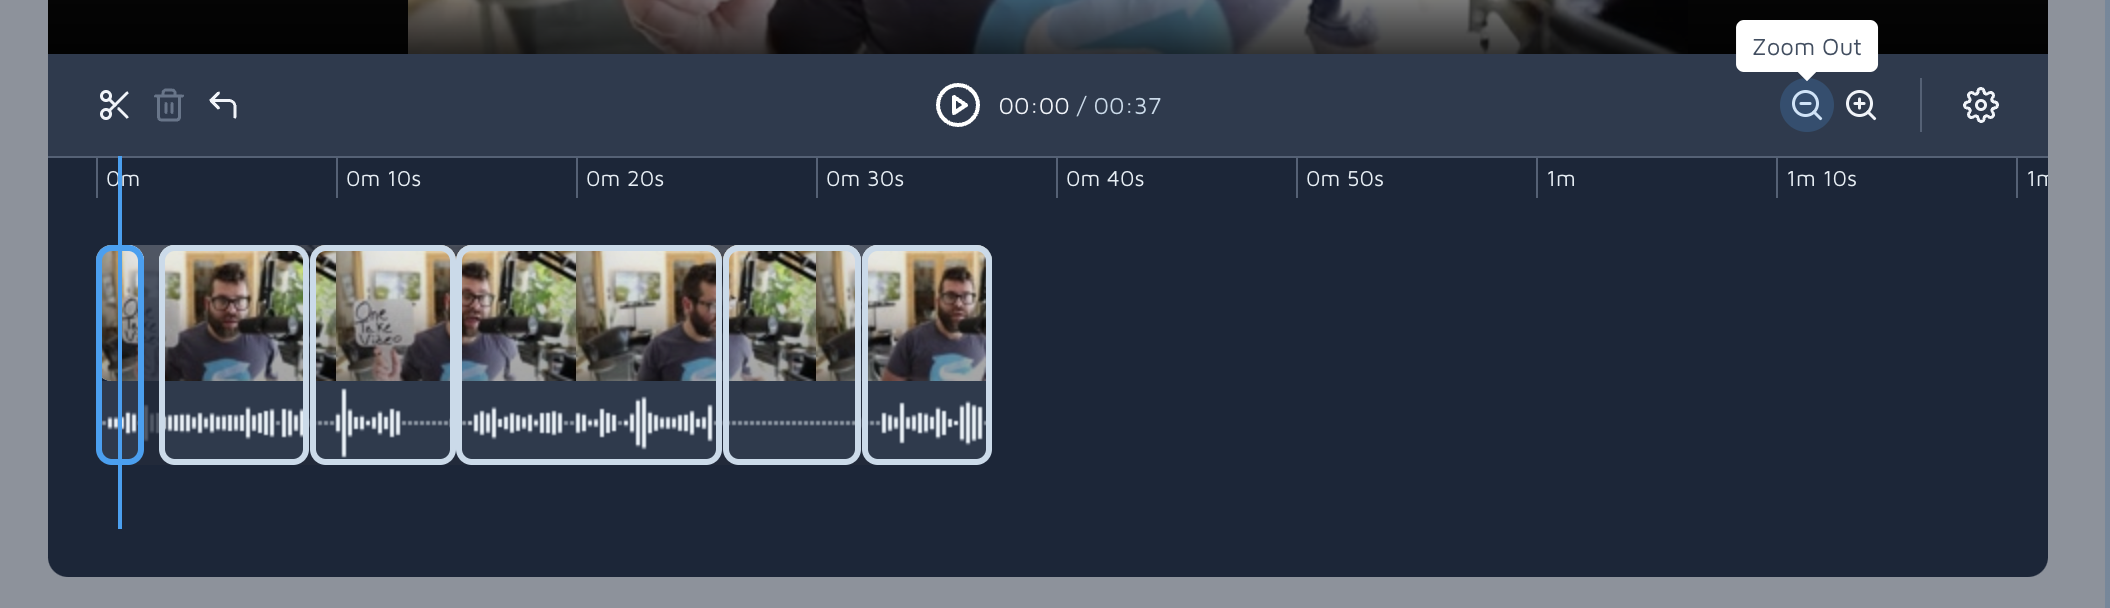
The zoom features allows you to zoom the editor's timeline in or out so to that you are able to see more or less of the editable feed in one view.
Settings:
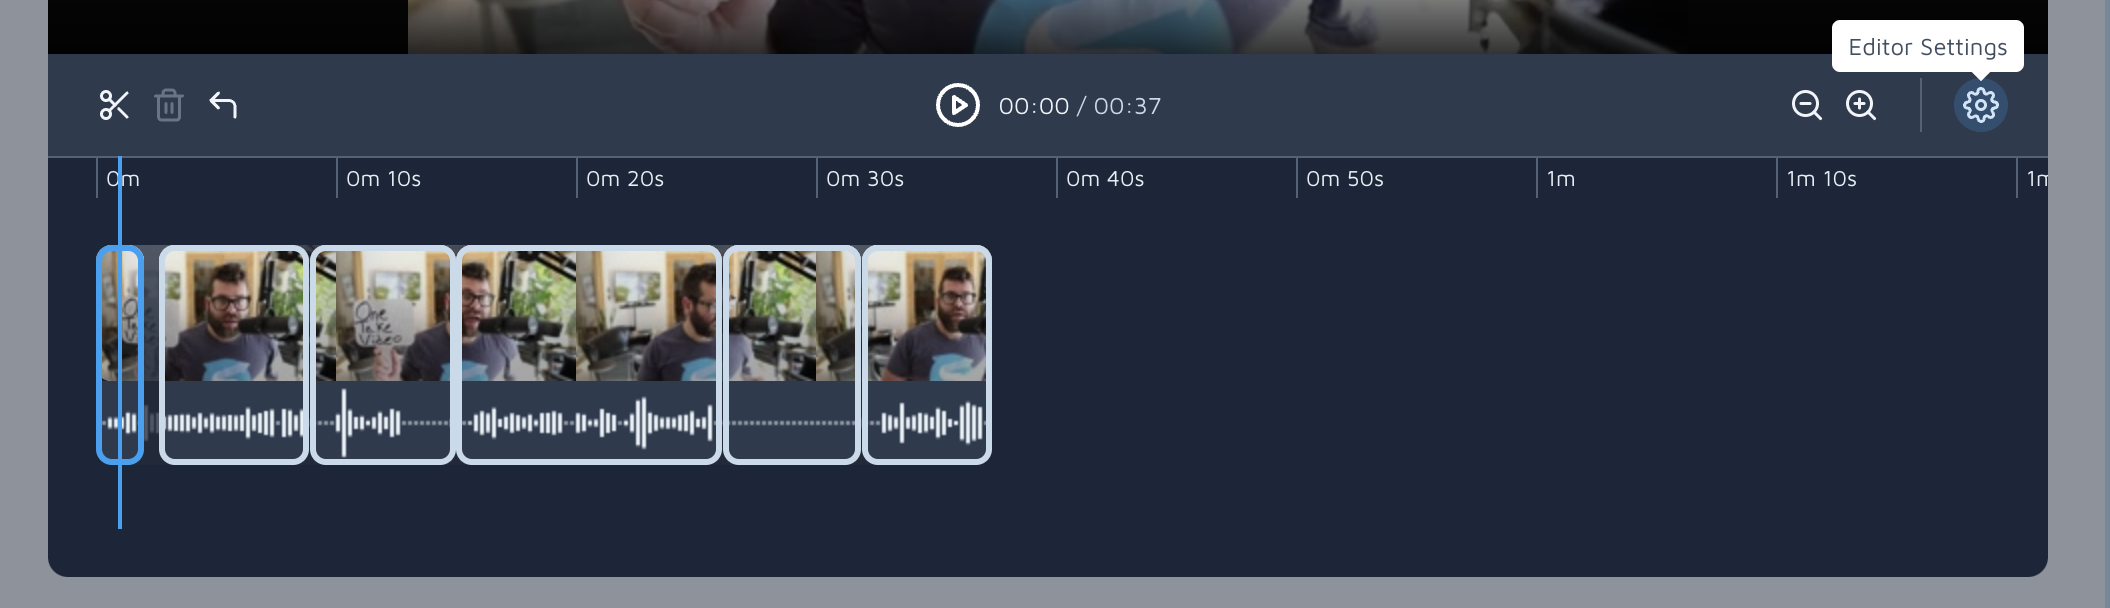
Currently the settings wheel has the option to change the transition between a fade or none (otherwise known as a jump-cut). Future iterations may include additional editor settings within this menu.

These editor settings can be changed on a per video basis, but your last selection will persist as your default for your next video edit. Your selection will apply to all transitions within your current video, meaning you cannot have both "fade" and "none" (jump-cut) transitions within the same edited video. Whatever is selected here will be applied to all cuts.
Shortcuts are also available for some of the above functions via your keyboard while in the video editor:
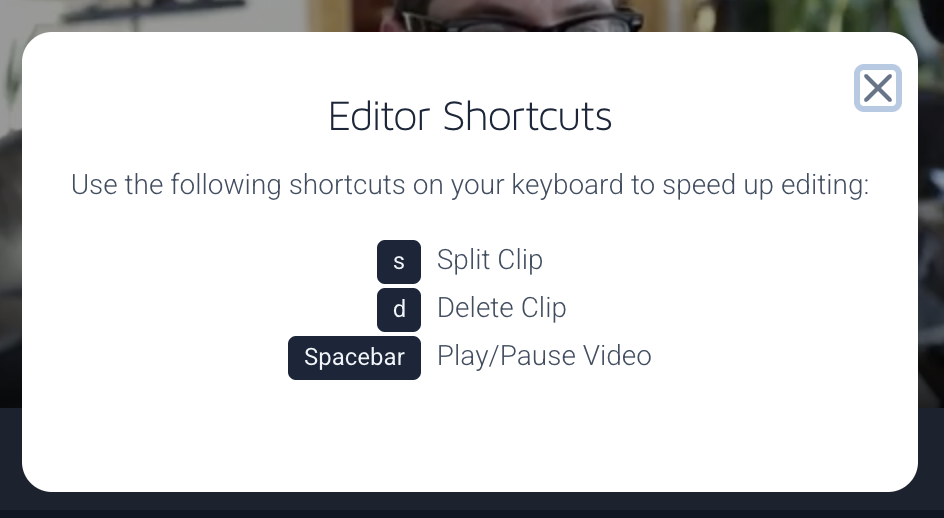
You can review available shortcuts any time within the editor by clicking on the "?" in the upper right.
Saving Your Edited Video
When you're done making edits to your video click the "Save & Exit" button within the editor to save your video with the edits you've made. If your video was saved to a Sales Page, then the video will appear on the page at this time (so, if the Sales Page is published, it will be visible to anyone viewing the page).
If you click "Cancel" to leave the editor without saving any of your edits, then you can come back to edit the video at any time (see the section "How Do I Access the One Take Video Editor?"). If your video was saved to a Sales Page, then your unedited video will not appear on the Sales Page until after you've saved it from the editor.
Note that you can edit the same video as many times as you want, but each time you save a Video's edits those changes will immediately be live anywhere the video is used.
How Do I Access the One Take Video Editor?
The One Take Video editor can be accessed in three ways:
- Immediately after recording or uploading a BuyerVideo
- From the Sales Page editor (only for videos saved directly to a Sales Page)
- From the Videos section of your dashboard
1. Accessing the Editor after recording or uploading a BuyerVideo
The seamless way to access the editor is by clicking the "Edit Video" button shown on your BuyerVideo right after you've recorded or selected a video for upload. Clicking this button will upload your video and then immediately load it in the editor for editing.
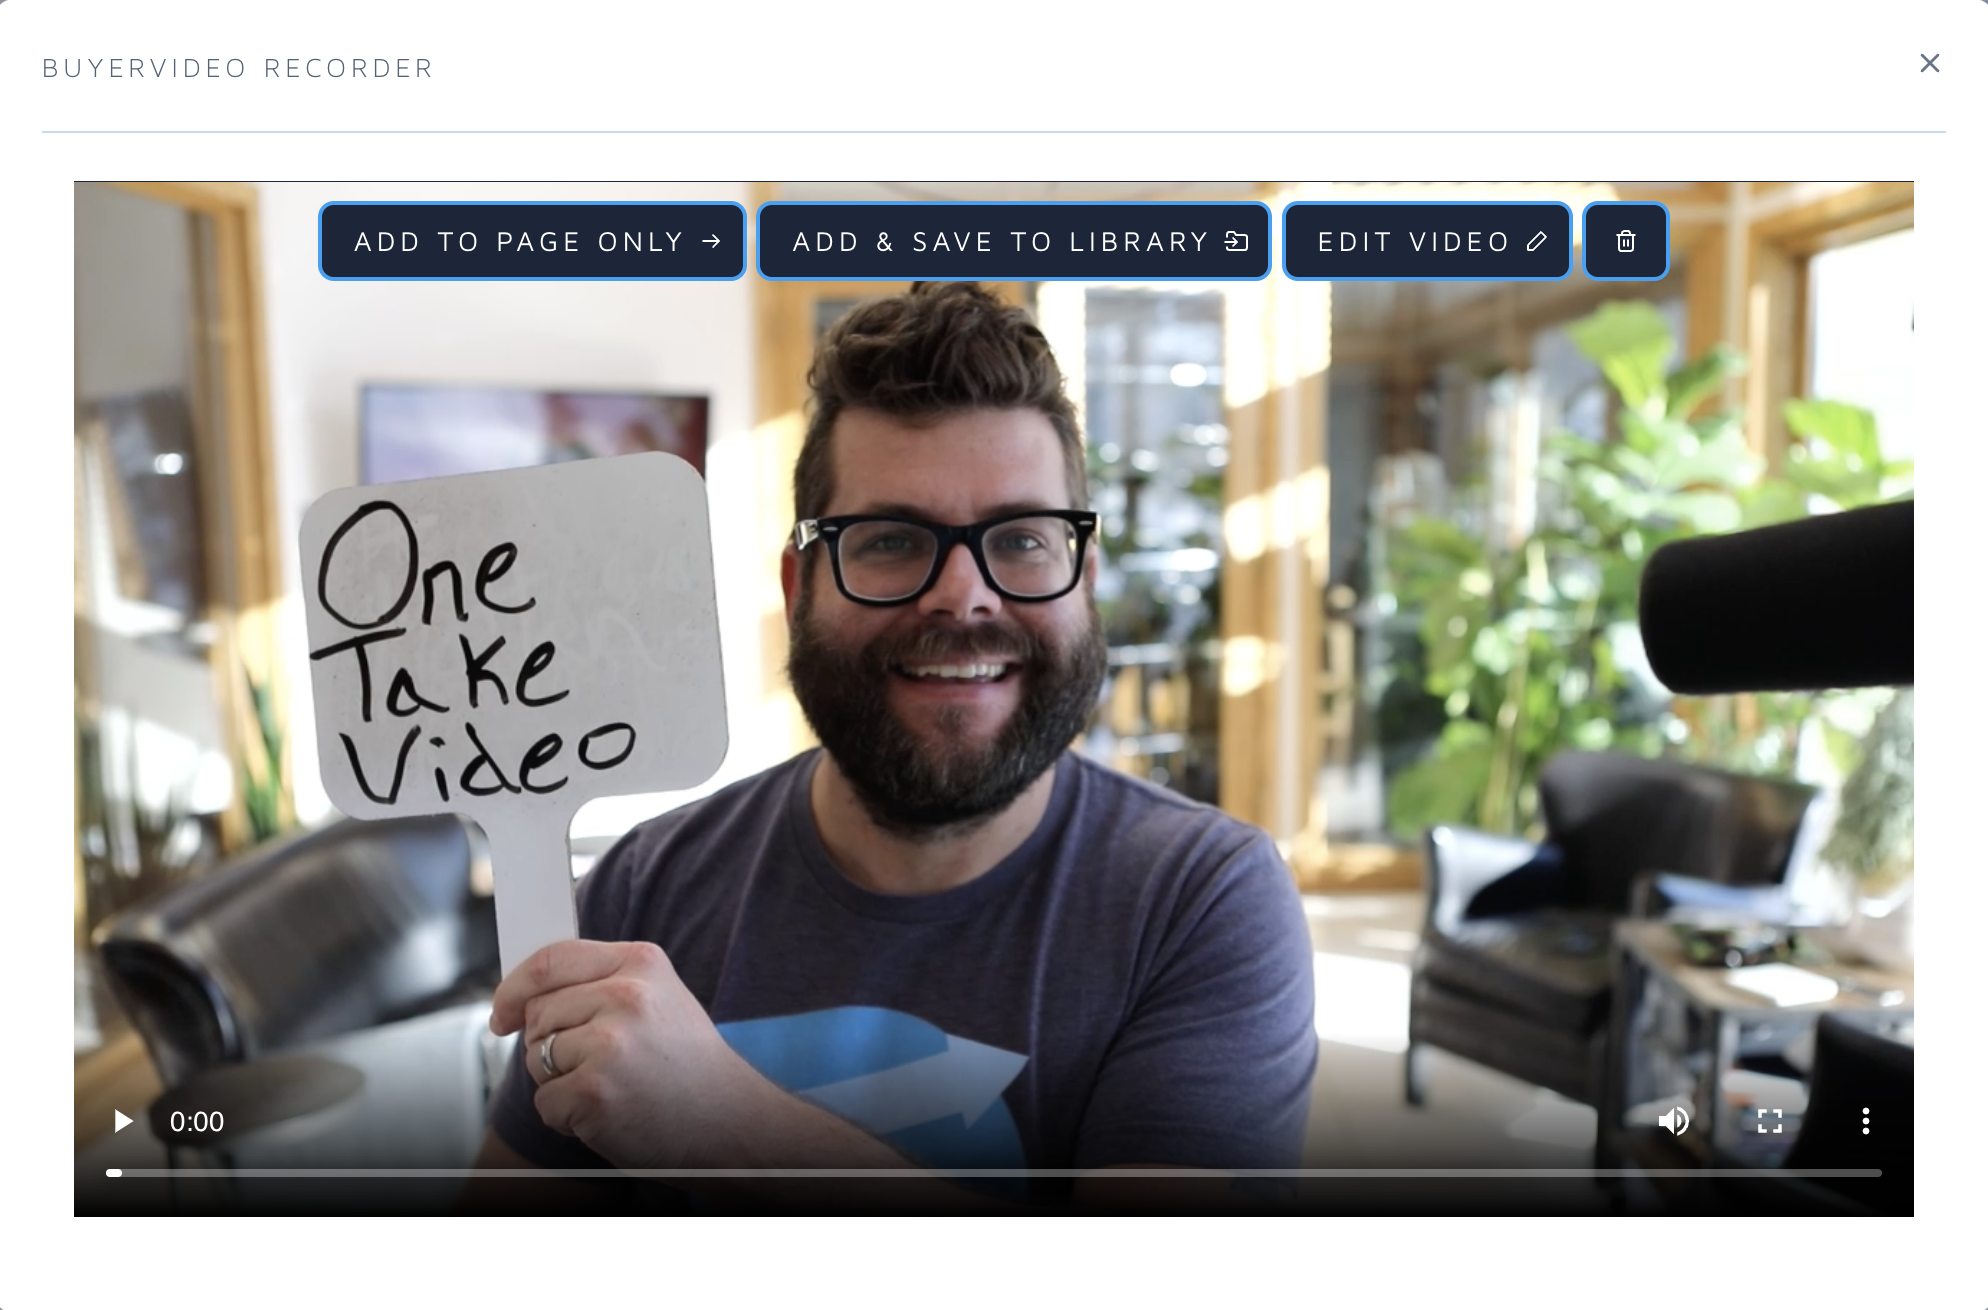
Don't worry - if the video you wish to edit was saved to a specific Sales Page, it won't appear on the page until after you've saved the video from the video editor.
2. Accessing the Editor from the Sales Page editor
If you've recorded a BuyerVideo on one of your Sales Pages and selected "Edit Video", but haven't yet edited it - then you can access the editor directly from the page editor by clicking the "Open Editor" button.
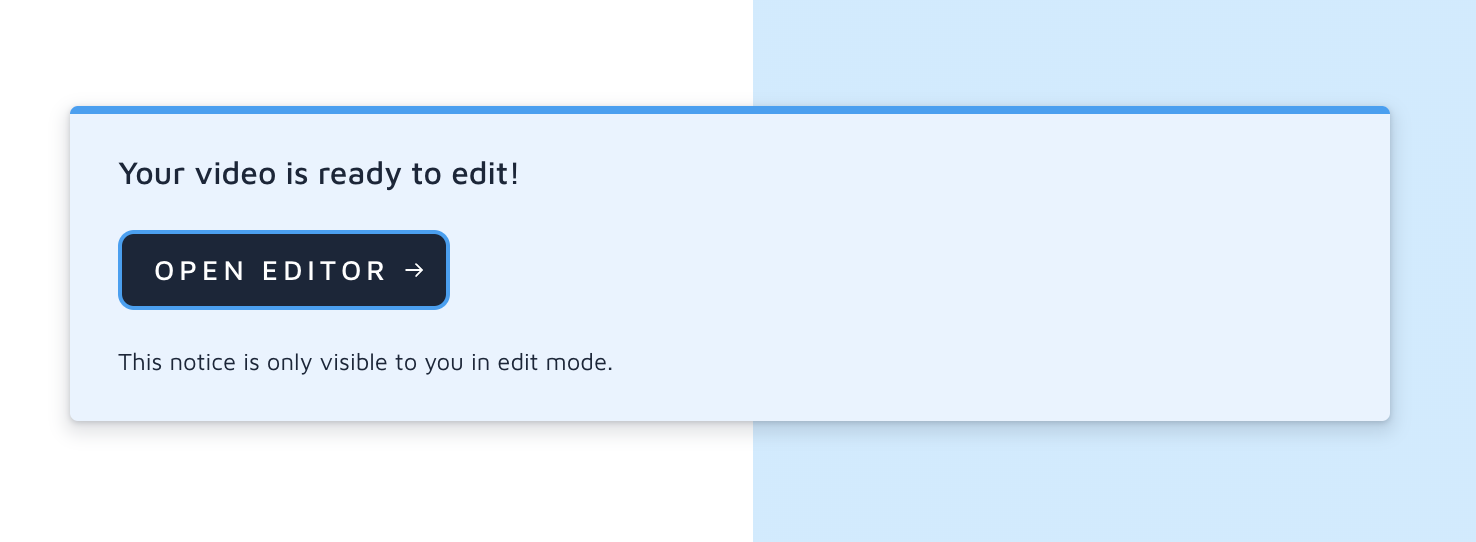
This button is shown until you've saved the video from the Editor.
3. Accessing the Editor from the Videos section of your dashboard
BuyerVideos can be edited at any time from the Videos section of your dashboard. Simply click on the kebab menu next to the video you wish to edit and click "Edit Video". If this is your first time editing a video since the last time it was saved then it may take some time for the video to be processed and prepared for editing - so we recommend checking back in a minute or two after clicking "Edit Video".

