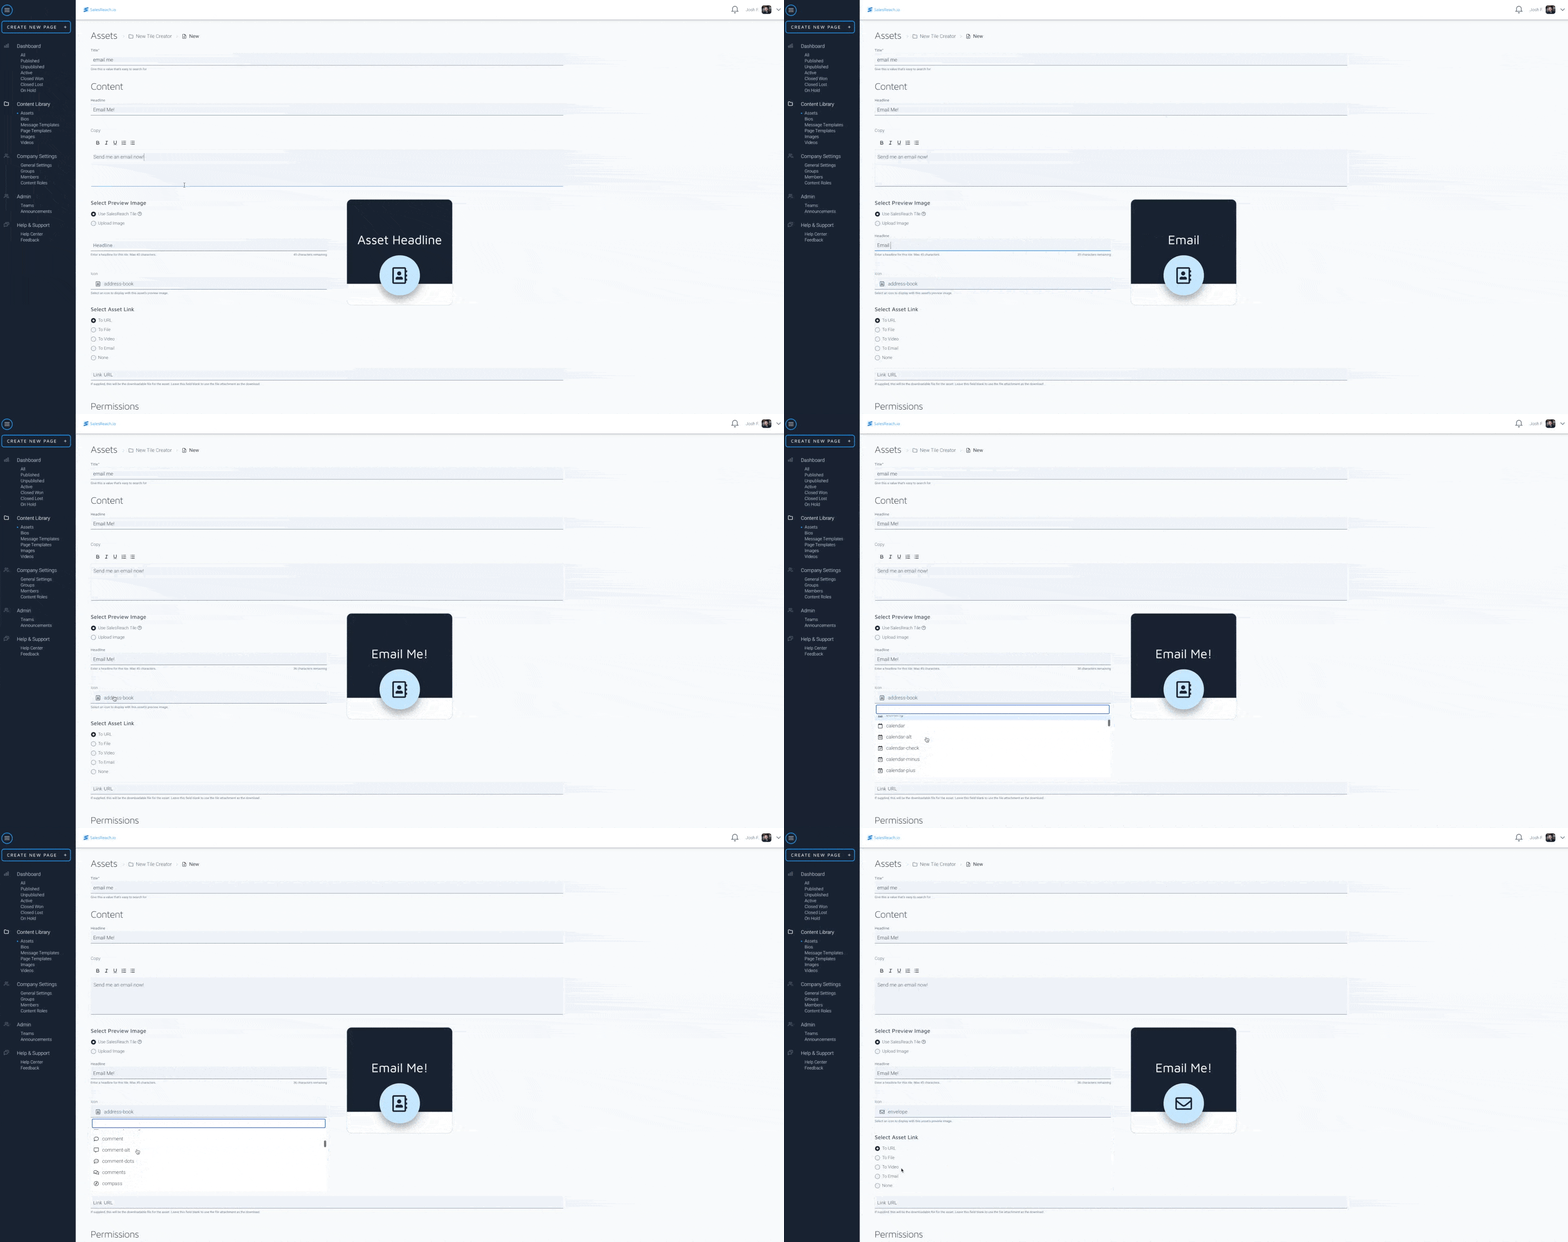
Asset Tiles are graphics that represent the content in your Content Library and appear on Sales Pages. They reference your Company Settings and are always on-brand.
Video: Introducing the Asset Tile Creator
SalesReach offers customer-facing teams a custom option to include a custom graphic or screenshot as a graphic on the Sales Page.
However, not every salesperson or customer support rep has amazing graphic design skills.
You don't need to get fancy in Photoshop or learn how to code to create amazing digital experiences for your buyers with SalesReach.
The Asset Tile Creator does all of the graphic design work for you.
Creating Asset Tiles to represent your content on Sales Pages is faster and way more controlled than ever before.
Asset Tiles are simplified and adhere to user experience best practices and ensure that your company's brand is retained.
Now your buyer will have a consistently personalized experience with everything they need to feel confident about their purchase in one place.
The Asset Tile Creator module is found whenever you create a new Asset in the Content Library
How to use the Asset Tile Creator
- Login to SalesReach
- Locate the Content Library on the left sidebar menu
- Click Assets
- In the upper right click "Create New"
- Select Asset
- Complete the necessary information
- Locate options beneath "Select Preview Image"
- Select "Use SalesReach Tile"
- Create a headline for your tile (limit to 49 characters)
- Select an icon to represent your file
- Include your Asset source (URL, share link, file, embed, email, etc)
- Click "Save" in the lower right
Swap from custom image to an Asset Tile
You can also edit any asset and switch from the upload image option to Use SalesReach Tile under Select Preview Image.
How the Asset Tile Creator works
The Asset Tile Creator references your team's Company Settings. All colors and fonts would have been set up in the Company Settings under General Settings in the Global Page Design section.
All Asset Tiles reference colors from Global Page Design
- Primary Color 1 sets the banner background and the stroke of the icon.
- Primary Color 2 sets the background for the icon in the circle.
- All text on banner backgrounds is white.
